The Mighty Integration with DevSecOps Insights
2 mins read
Key features
- Pipeline configuration through Jenkins
- Commit insights
- Delivery quality insights
- Build traceability
- Release/Sprint health
Steps to configure DevSecOps Insights
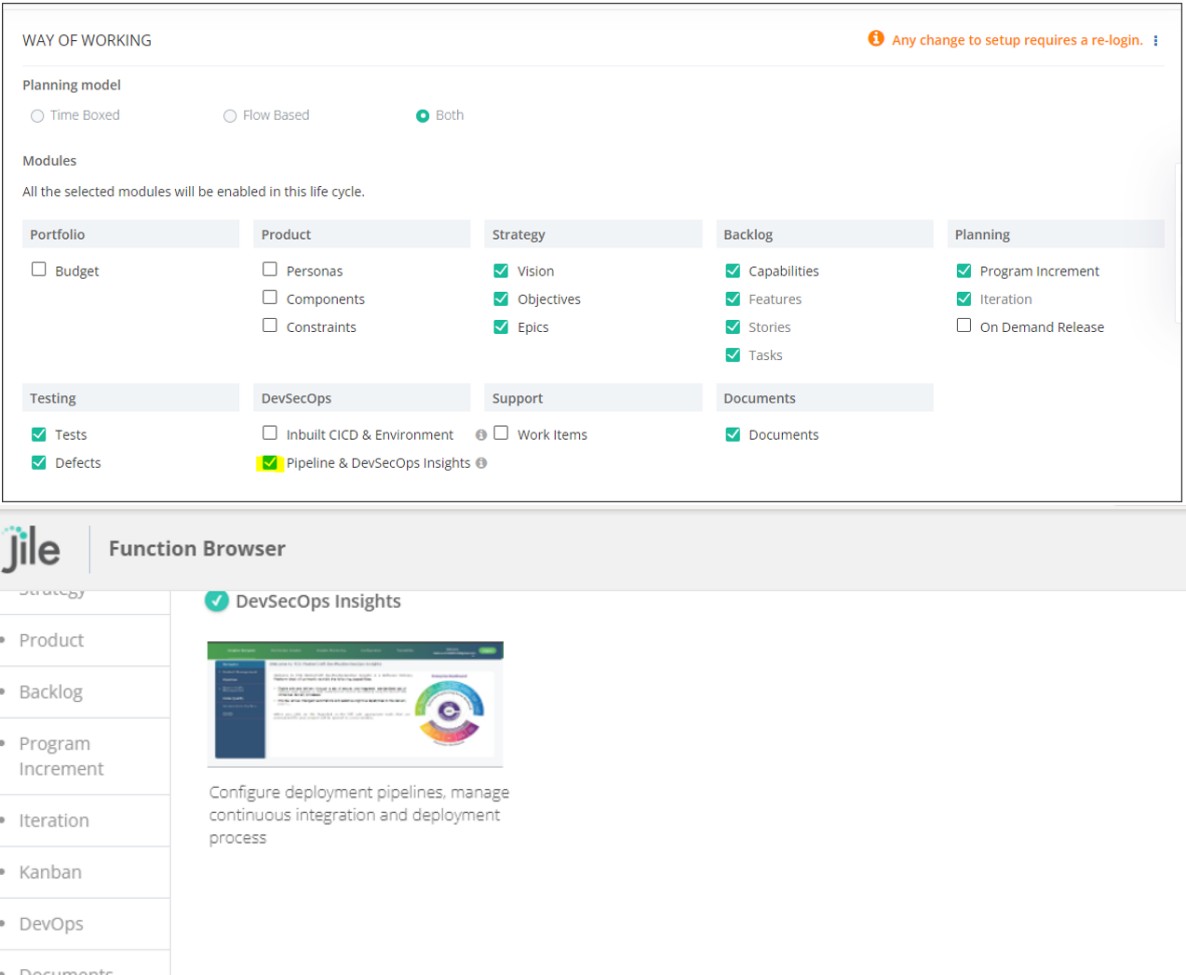
Steps to configure DevSecOps Insights:
1. Navigate to Domain Setup > DevSecOps Configuration.
2. After successful integration, you (Domain Admin) can work with the Support/Deployment team to finish the configuration.
3. To add a new module - 'Pipeline and DevSecOps Insights' navigate to Setup > Way of Working and follow the guided steps.
4. To enable a holistic dashboards view and to access the pipelines from the configuration screen, you can choose a separate configuration along with access control.
5. Single sign on is enabled for the users to log in to 'DevSecOps Insights' and access the screens as per their access rights.
Note
- This feature is available only on select editions (Standard & Ultimate).
- This feature includes deployment of on-premises components necessary to set up CI/CD pipelines and repository. Engaging deployment support for configuration of the complete setup is necessary.
- The existing 'CI/CD pipeline' feature (renamed to 'Inbuilt CI/CD Environment') is being planned to be deprecated in the upcoming release. Any further enhancement to DevOps functionality will be done within 'DevSecOps Insights' feature.
One Traditional Portfolio View for All
2 mins read
- A common Portfolio can be created for Programs/Projects that follow the Waterfall model.
Note:
Programs/Projects following the Agile Way of Working will have separate Portfolios.
A New Avatar of Homepage
2 mins read
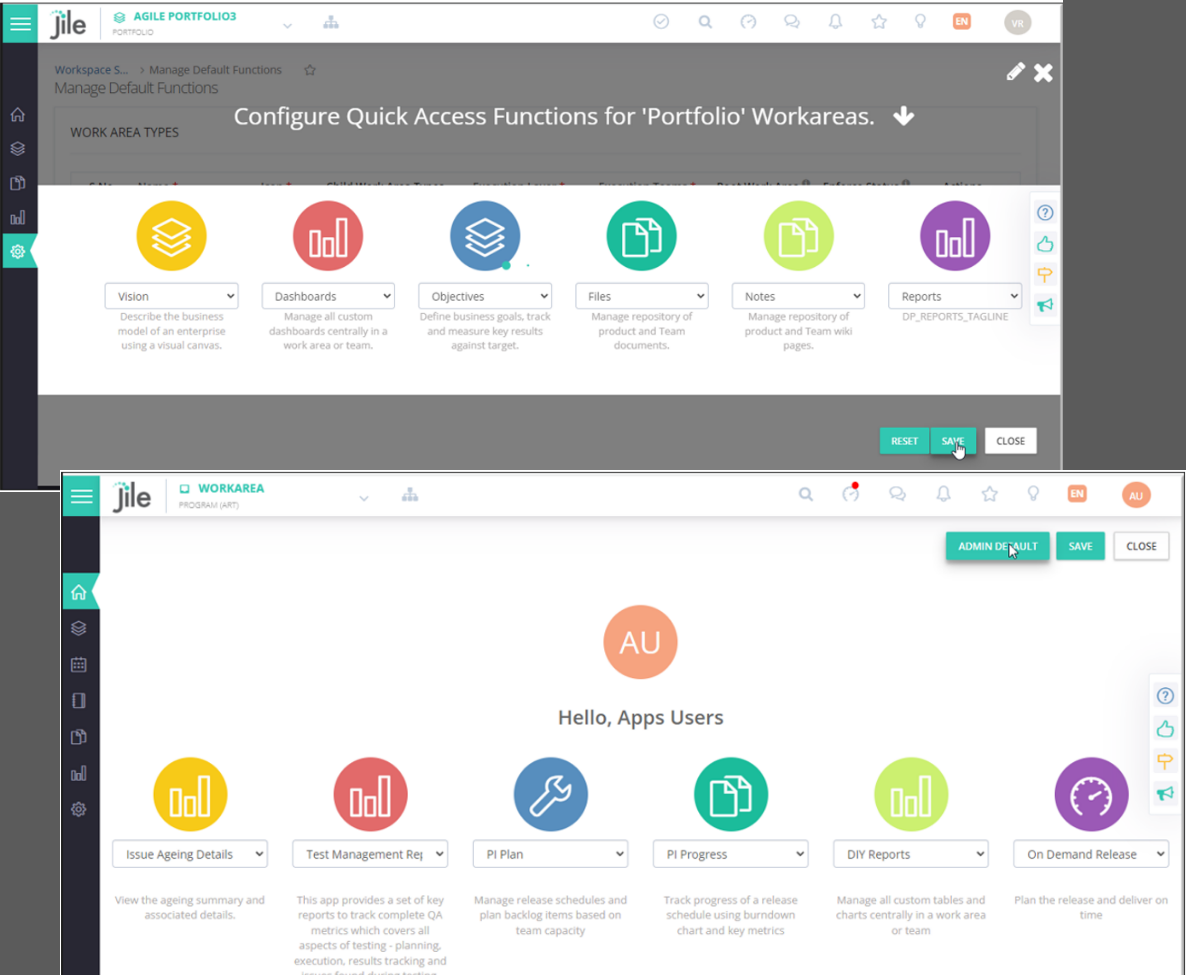
Enhanced navigation for quick access
You can quickly navigate through various functions, with up to six customizable icons right on the home page.
Each icon can be linked to a URL, providing direct access to frequently used functions.
Personalized icons that suit your requirements
Users and admins can personalize the navigation icons that suit their preferences as well as specific workflows.
Admins can set a default configuration for all users by using the 'ADMIN DEFAULT' option.
Central icon management system
A central management page is included to allow admins or authorized users, to ensure uniformity across all user homepages.
Individual users can edit and select their unique set of six icons on the home page, subject to permissions set by the admin.
Enhanced icon selection and editability
Icons and titles can be selected and edited based on the associated work area and availability of functions in the left pane.
Users can select up to six icons only for the functions available in the left pane.
Advanced left pane customization
Edit: Enables users to select functions available in the left pane. Icons that are not available in the left pane are disabled.
Save: Saves the selected icon configuration.
Close: Reverts to the previous icon set.
Admin Default: Resets the home page to the default icons selected by the admin.
Direct linking of Features and Stories to On-demand Releases
2 mins read
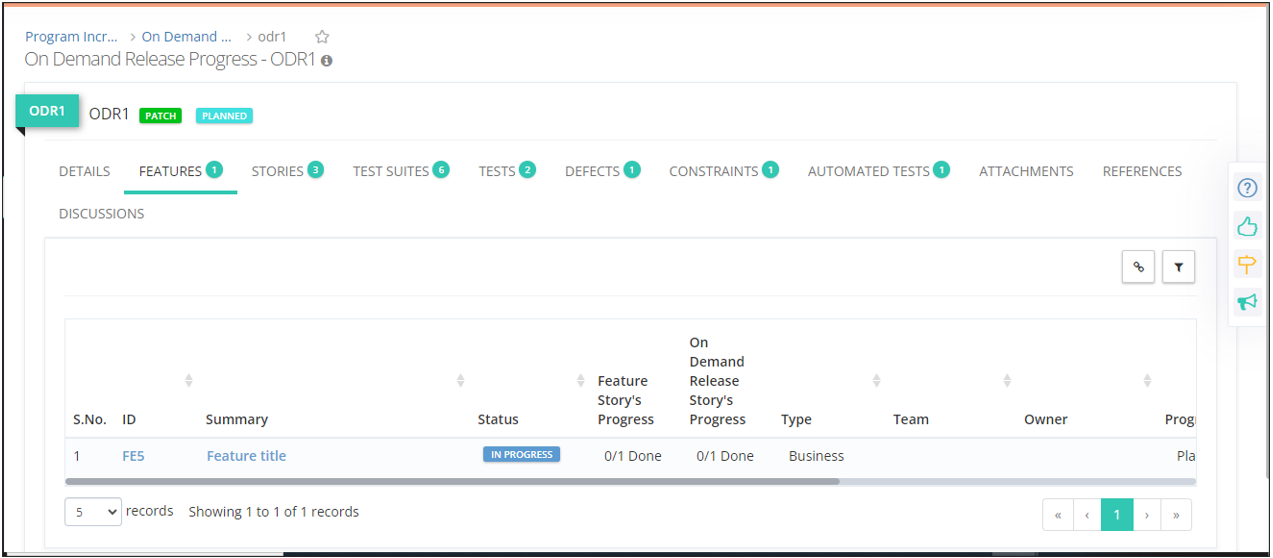
Plan and track your application/ Product roadmaps better by linking features and their user stories to on-demand releases. This capability allows users to directly link Features to a Release. Features and Stories linked to a Release are displayed in their respective tabs. Stand-alone Stories can be linked directly to a Release, whereas for Stories that belong to a Feature, the Feature must be linked to the Release.
Seamless collaboration now possible between testing teams
2 mins read
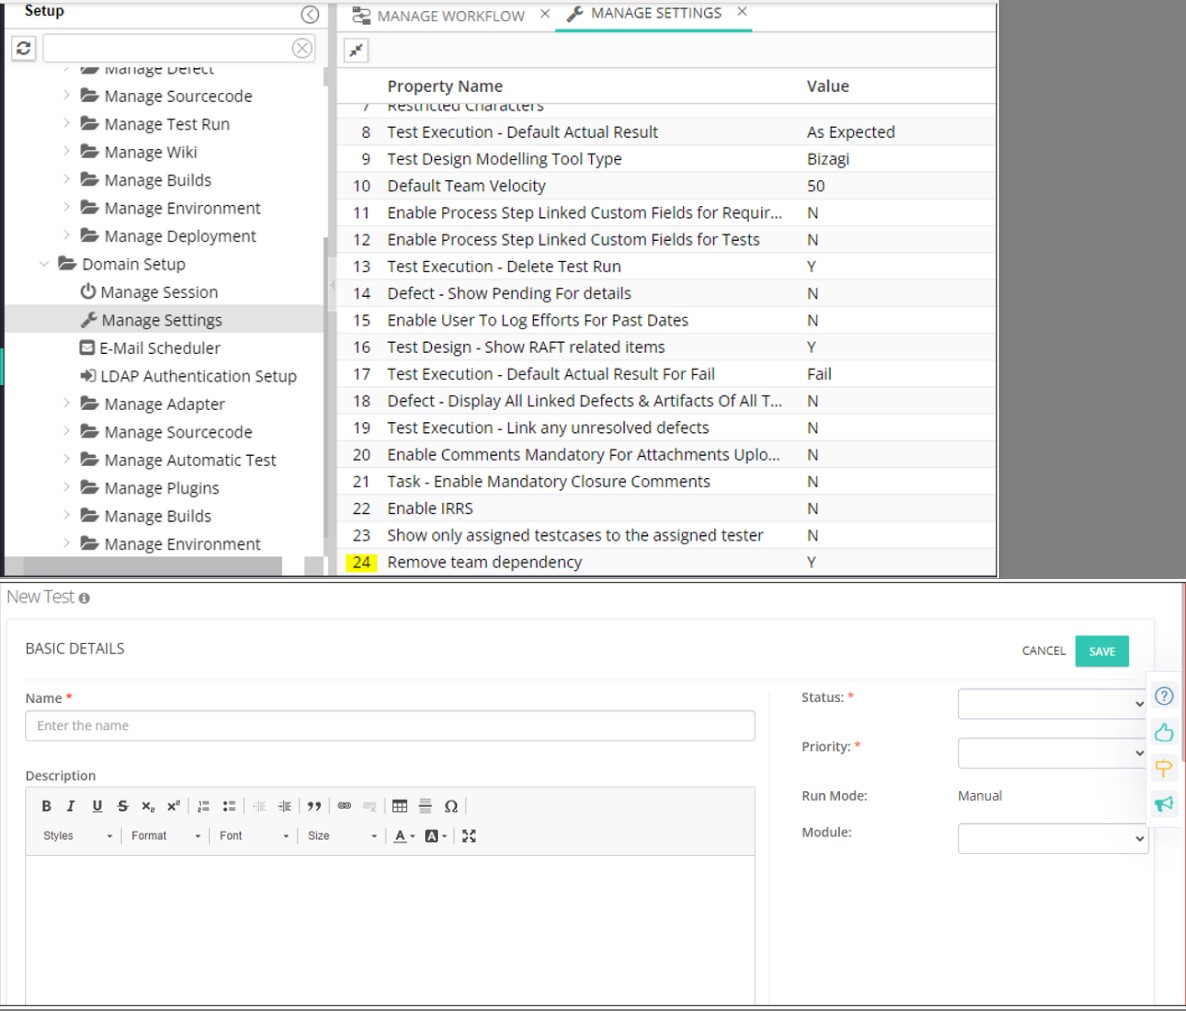
Allow Teams within a workarea to collaborate with each other for Test Design and Execution
Teams within a workarea have an option to work independently or collaborate with other Teams, to design and execute test cases. The workspace admin can configure this feature as per the requirement.
An All-new Gantt Timeline View
2 mins read
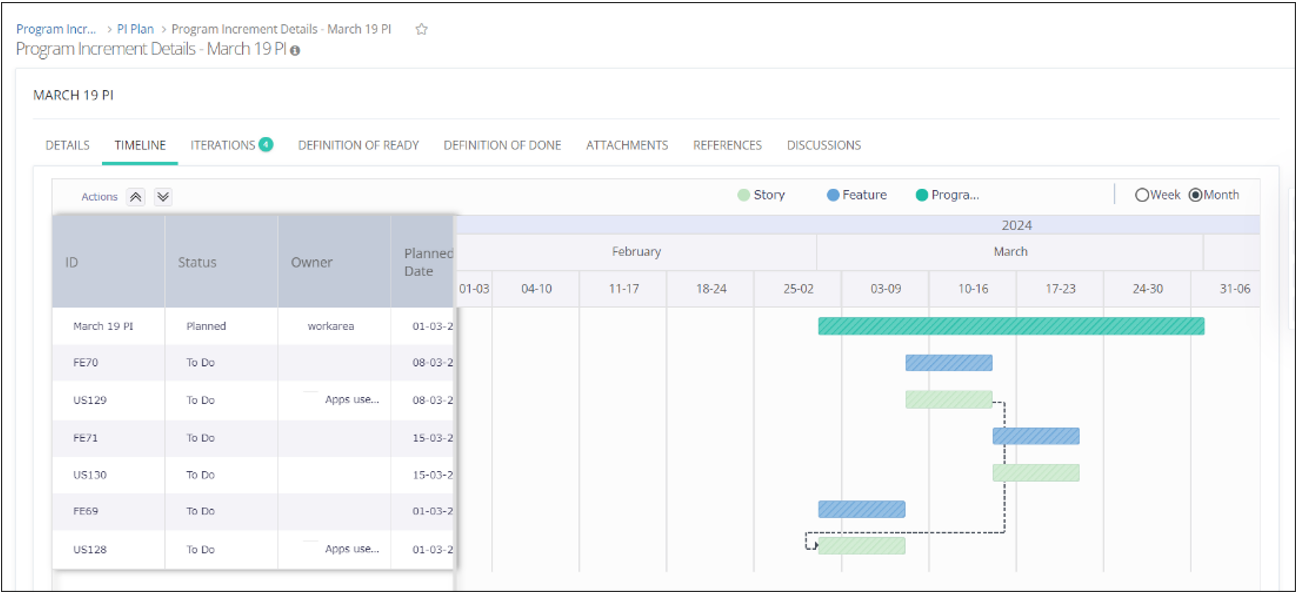
- A Gantt chart is introduced to depict all the planned versus actual timelines for a given release.
- It provides crystal- clear visualization of Finish-to-Start dependencies.